Brunhilde refurb update

Discuss all things 1970 & later Airheads right here.
Post Reply
User avatar
Airbear
Posts: 2878
Joined: Tue Aug 03, 2010 10:02 am
Location: Oz, lower right hand side, in a bit, just over the lumpy part.

Brunhilde refurb update

Post by Airbear »

This was how Brunhilde looked about two months ago –

Image

Now she is back together after a lot of work and waiting for stuff to arrive from all over the planet. Bits replaced were: valves, rockers and valve lifters (all good used). New parts were: master cylinder, steering head bearings, gaiters, carb needles, filters, coils and points. All precious fluids replaced. I added some idiot lights to the headlight bucket to replace the inadequate ones in the Acewell instrument. The wiring is getting tidier, but there is more to do there. I’m thinking of shifting part of the rat’s nest to the now available space under the tank.

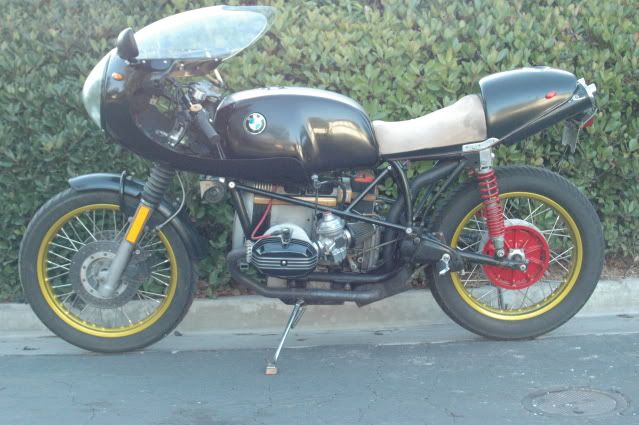
Lots of things were fixed, tweaked, bent to my will or simply tidied up. Frame and subframe got a satin black powdercoat and the other paintables are matte black (Killrust Epoxy Enamel rattle cans). I really like the look – the matte reflects light in interesting ways – under full sun there is a golden sheen. Here under light cloud, it looks silvery. I baked the paint well (by the wood heater) between coats and it seems quite robust.

Image

Fixing the side stand was an interesting exercise. The tip of the stand had at least 50mm of slop. The pin had detached from the frame and had carved oval holes in frame and stand.

Image

I used a 14.5mm reamer to make nice round holes and lathed up a new steel pin – interference fit into the frame hole and sufficient clearance for grease in the stand hole. This got a dob of weld to the frame, as per original.

Image

The poor worn centre stand also got some treatment. I cut 12mm wide slots in the bottom curve (where the metal had worn through) and welded in some 3mm steel, curved to suit.

The alloy bits received the Rub’n’Buff treatment after a thorough clean, using the Pewter flavour.

Image

The headers and mufflers were a surprise - all that brown crusty shit polished off. I started with kerosene, then a stainless steel 'cleaner' (Sulphamic acid) and a scotchbrite pad. Then used a buffing wheel on my bench grinder with a s/s polish, and they came out gleaming like new. Headers are now developing a golden glow after first rides.

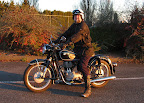
For those who may be concerned about loss of patina, rest easy. Let me assure you there is still sufficient evidence of Brunhilde’s hard life, at my hands and those of previous butchers. All her scrapes are there, the rusty nuts and bolts with the corners off, the chisel marks in the exhaust nuts, the tarnished carb clamps, etc, etc.
Some more pics.

Image

Image

Now I’m thinking I would like to have gloss black pinstriping on the tank. I would also like to make a somewhat shorter and lower seat. Being a person of sensible height, I'm finding that the last couple of inches on this police seat are not used. I'll be making a new rear rack out of some nice timber, all nicely mortised and tenoned and epoxied and varnished to within an inch of its life. There should be more wood on old airheads.

I’ll offer some advice to others contemplating a complete teardown:
There are a lot of bits. Don’t worry, they all go back where they belong. Work methodically, take lots of pictures, make notes, label wires with little stickers. Egg cartons make good containers for nuts and bolts, etc. Shove the invoices away without adding up the numbers. Get used to the fragrance and flavour of your favourite solvent cleaner (mmm, kerosene). Use a barrier cream on your hands. Explain to your significant other that you may be preoccupied at times, that you are having an affair of sorts but it is not to be regarded as any sort of challenge and that you will reappear eventually with that old twinkle in your eye.

Some acknowledgements:
Thanks to Jeff of Albury (ME109) for the gorgeous RS front mudguard, kindly donated.
Thanks to George of Bethanga (Siegfried) for use of lathe and other tools, also welding and electrical troubleshooting.
Charlie
and Brunhilde - 1974 R90/6
Image

Graduate, Wallace and Gromit School of Engineering and Design (Pending)
Deleted User 62

Re: Brunhilde refurb update

Post by Deleted User 62 »

Looking Good there Charlie!
ontic
Posts: 134
Joined: Tue Aug 03, 2010 10:40 pm
Location: Melbourne, Australia

Re: Brunhilde refurb update

Post by ontic »

Well done Charlie,
I can't wait to see her in the flesh.
For your shorter lower seat I might have something good for you- the remains of my G/S seat. I cut the rear pillion end off the double seat to slot behind my G/SPD single seat (as a removable pillion option). I've got the front half of the G/S seat left. The pan is plastic, the foam is OK. It is quite short, probably a bit too short for me, and a bit narrower than the denfeld solo seats, but should be OK for someone of a sensible arse size. You could shave the foam to desired thickness and shape and would then have to make a cover and figure out attaching it. When I remember I'll try to plonk it on my R90 and see how the fitment goes- might require a little bit of tinkering but I think it would be an easy (and lightweight) option.

Cheers,
Speak soon,
(no internet at the new home yet I am not checking in much)
1974 R90/6
1981 R80G/S
Garnet
Posts: 3108
Joined: Tue Aug 03, 2010 6:24 pm
Location: Victoria BC Canada

Re: Brunhilde refurb update

Post by Garnet »

It's going to be tough go and get the old girl dirty............... but then again, maybe not. :mrgreen:
Garnet

Image
ME 109
Posts: 7295
Joined: Tue Aug 03, 2010 3:00 am
Location: Albury, Australia

Re: Brunhilde refurb update

Post by ME 109 »

Jordan said it looks sick Charlie. :P I reckon it does too. :P :P
Almost cafe, he said.
I'm thoroughly impressed. Just out of interest, If I dropped my RS over for a bit of a tart up, do you think I could have it back tomorrow?
Lord of the Bings
User avatar
Airbear
Posts: 2878
Joined: Tue Aug 03, 2010 10:02 am
Location: Oz, lower right hand side, in a bit, just over the lumpy part.

Re: Brunhilde refurb update

Post by Airbear »

Hans, that bit of seat would be a great start - the right sort of foam is impossible to find up this way, and I have a hard time contemplating buying some off the net without giving it a squeeze first. Thanks for the offer.

Sick, eh Jeff? That's a compliment not to be taken lightly from an 18 year old. Yeah, drop the old girl off and it'll be ready Friday. Not sayin' which Friday, mind you.

And yes, she will get dirty. But she'll be clean under the dirt. Thanks all.
Charlie
and Brunhilde - 1974 R90/6
Image

Graduate, Wallace and Gromit School of Engineering and Design (Pending)
Mal S7
Posts: 661
Joined: Thu Aug 05, 2010 5:26 am

Re: Brunhilde refurb update

Post by Mal S7 »

Fully sick bro'!

The pipes look like bought ones! A bit of shiny is always a nice contrast with the matt black.
You would have to be happy with that Charlie.

cheers
Mal
Chuey
Posts: 7632
Joined: Mon Aug 02, 2010 11:56 pm

Re: Brunhilde refurb update

Post by Chuey »

Nice work, Charlie. But, where's your bicycle? Not in your work space, I see.

Also, surely you could fit lots more on those shelves in the background. I'd have them stuffed full. Of what, I don't know but that is my way and sometimes I wish it wasn't.

Chuey
Motorhead
Posts: 391
Joined: Mon Aug 09, 2010 8:30 pm

Re: Brunhilde refurb update

Post by Motorhead »

A decent bit of work turned out nicely............... good job
Chuey
Posts: 7632
Joined: Mon Aug 02, 2010 11:56 pm

Re:Wood Baby!

Post by Chuey »

Image

Image

Image

If you look, there's wood on there. In addition to the two detail shots there is wood on the sides where I have turn signals. It is used to cover the unused choke lever housing. The struts for the fairing are what started it all.

Charlie, please show us pics when you get the rack done. Who doesn't like a nice rack?

Chuey
Post Reply