- DSC_0126x-800.jpg (132.43 KiB) Viewed 2724 times
My /5 rebuild intro.
-
x1Buellist
- Posts: 103
- Joined: Tue Jan 03, 2012 5:11 pm
- Location: Fairfield,CA
Re: My /5 rebuild intro.
With the front end half disassembled and waiting for Gaiters to arrive, the only progress I made this week was making a new front hinge for my solo seat. I actually made several versions. This one fits pretty good. A lot stronger than the stock one also.
73' R75/5 LWB
-
Major Softie
- Posts: 8900
- Joined: Tue Aug 03, 2010 1:46 pm
Re: My /5 rebuild intro.
Looks very nice. Has to be perfectly oriented to prevent binding though.
MS - out
-
x1Buellist
- Posts: 103
- Joined: Tue Jan 03, 2012 5:11 pm
- Location: Fairfield,CA
Re: My /5 rebuild intro.
Yeah, I actually made several of them until I had the dimensions just right.
73' R75/5 LWB
-
x1Buellist
- Posts: 103
- Joined: Tue Jan 03, 2012 5:11 pm
- Location: Fairfield,CA
Re: My /5 rebuild intro.
This week I am working the forks over. After taking it all apart I did the alignment with a plate of glass and was really happy that the fork tubes were perfectly flush with the glass. The fender brace though was off a bit so I had to bend it slightly. Now it is flush with the glass also. Don't mind my crazy rope tieing up the headlight housing 
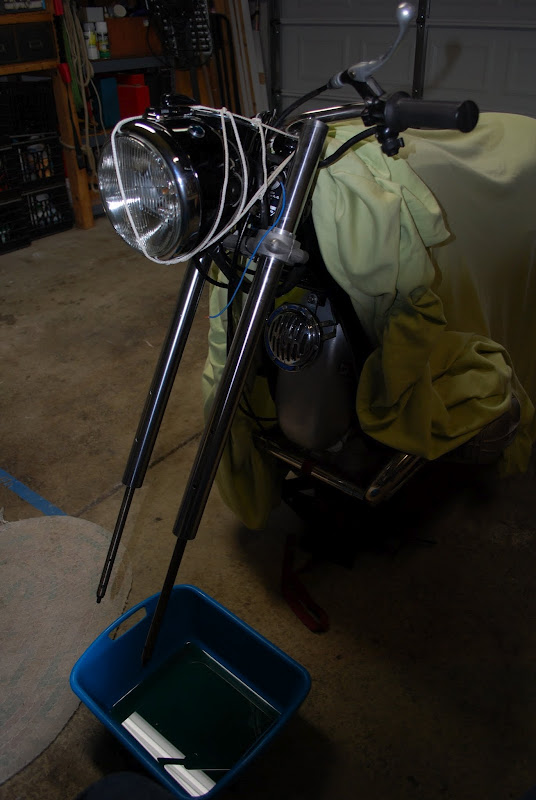
I started making a tool to mount the dial indicator to so I can measure for parallelism. Waiting on the dial indicator I bought on ebay so I can cut the mount down to fit the gauge. That was fun.

My fork springs, you can see in the picture that the right side of the springs are coiled tighter than the left. I am thinking that the tighter coils should be at the top. Any thoughts on that? I notice the progressive springs I have seen on the internet have tighter coils on both sides. Is this spring a standard BMW spring type or were their springs the same spring rate from end to end? Also, the springs are 575mm long. I see on the BMWHucky site that he lists 555mm as being the default BMW spring length. Doesn't seem like the extra length will hurt anything. Would you think that is correct?

Here's a wider shot of what has become of my work bench. Once I get these forks back together I'll get my working space back. Oh yeah, I bought one of the Toaster Tan fork braces you can see there and bought a pair of the 13 rib gaiters, I had 11 rib gaiters.

I started making a tool to mount the dial indicator to so I can measure for parallelism. Waiting on the dial indicator I bought on ebay so I can cut the mount down to fit the gauge. That was fun.
My fork springs, you can see in the picture that the right side of the springs are coiled tighter than the left. I am thinking that the tighter coils should be at the top. Any thoughts on that? I notice the progressive springs I have seen on the internet have tighter coils on both sides. Is this spring a standard BMW spring type or were their springs the same spring rate from end to end? Also, the springs are 575mm long. I see on the BMWHucky site that he lists 555mm as being the default BMW spring length. Doesn't seem like the extra length will hurt anything. Would you think that is correct?
Here's a wider shot of what has become of my work bench. Once I get these forks back together I'll get my working space back.
73' R75/5 LWB
Re: My /5 rebuild intro.
Sweet project man!
And er......the er....airhead bondage thingie is ok too!
And er......the er....airhead bondage thingie is ok too!
Lord of the Bings
-
Deleted User 62
Re: My /5 rebuild intro.
You are going to have to cut the tops of the fork ears off to get that alloy top brace to work...
-
x1Buellist
- Posts: 103
- Joined: Tue Jan 03, 2012 5:11 pm
- Location: Fairfield,CA
Re: My /5 rebuild intro.
Yep, it's a done deal. The top is cut and the paint is touched up. Having to do ireversable damage to the headlight ears was something that stopped me from buying one. Not only that, I had a SJBMW brace and sold it because I didn't want to cut them. In the end I decided the headlight ears are replaceable and from what I understand it is a worthwhile upgrade. I think the Toaster Tan brace is a nicer looking piece than the SJBMW equivalent.
73' R75/5 LWB
-
x1Buellist
- Posts: 103
- Joined: Tue Jan 03, 2012 5:11 pm
- Location: Fairfield,CA
Re: My /5 rebuild intro.
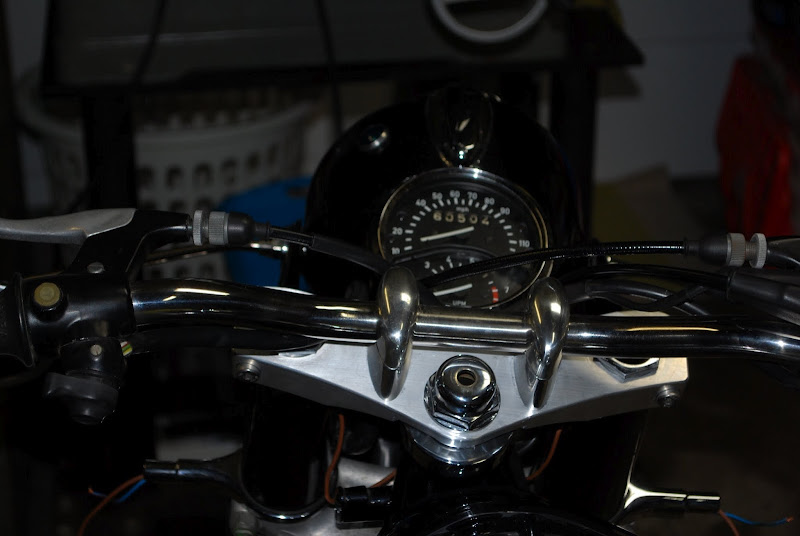
I made good progress on putting the front forks back together. I rotated the fork tube holes so they are pointed inward and measured the 160mm protrusion from the lower fork clamp. I completed making the fork paralellism tool. After learning how to slide the device up and down the fork tube without massive changes on the dial indicator I was very happy with the results, mostly .000 to .002. I Rub-N-Buffed the fork sliders and than started working through a combination of Duanes fork procedures while injecting the procedures from Stephen (Toaster Tan) to install the top brace I bought from him. While I was at it I added a ground wire to the front blinkers. I still have not determined where to ground the wires in the headlight shell but the wires have been put in place. I installed the new 13 rib gaiters (anybody need some premounted but otherwise new 11 rib gaiters) I also got the handlebars loosely mounted and the headlight shell mounted. That was a relief because everything was kinda hanging there all tied up. So, I am not done with the fork job yet. The lower brace was straightened but is not installed yet and I haven't added the fork oil yet, dampner needs installed also. All in all taking my time and as some one else said, sitting back and contemplating my next step with no rush definetely is paying off. I can feel the force of Zen and the art of motorcyle maintenance is strong in this garage
On to the pictures!
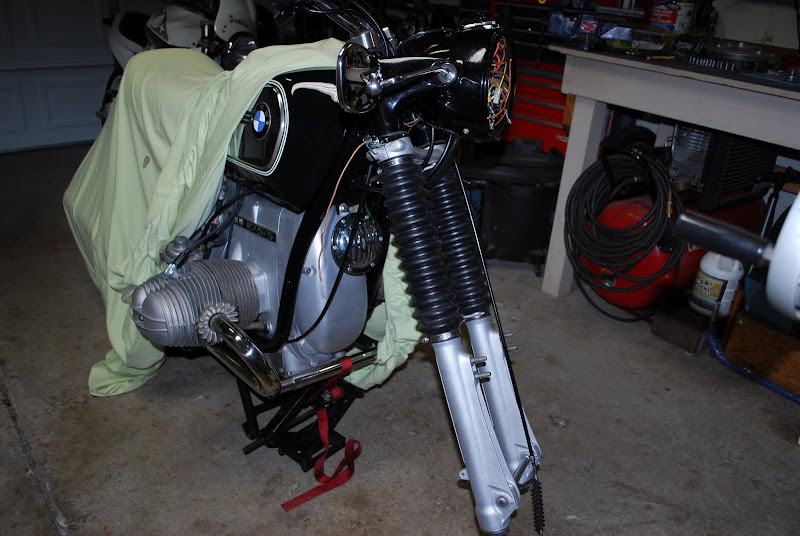
The Toaster Tan top brace.
YAY the forks are back together! The Rub-N-Buffed sliders turned out nice. Now to see how long this finish lasts.
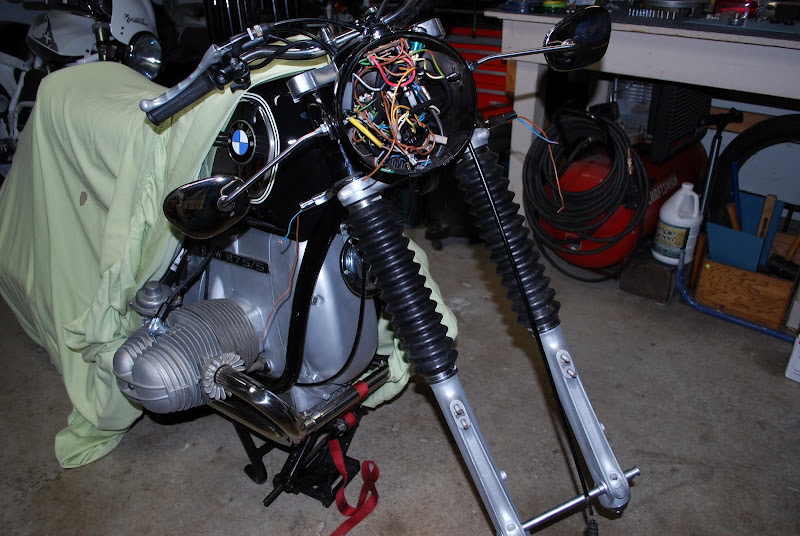
Kind of a wiring mess but It is as organized as I could get it. I see a couple unused ground tabs mounted to the bucket. I am wondering if this is a good place to ground the front blinkers. Seems like the headlight bucket does not have a solid connection to frame ground. It is rubber mounted. What do you think? This picture reminds me of one of those movies where the face of an android robot comes off and you see all of it's circuitry haha.
On to the pictures!
The Toaster Tan top brace.
YAY the forks are back together! The Rub-N-Buffed sliders turned out nice. Now to see how long this finish lasts.
Kind of a wiring mess but It is as organized as I could get it. I see a couple unused ground tabs mounted to the bucket. I am wondering if this is a good place to ground the front blinkers. Seems like the headlight bucket does not have a solid connection to frame ground. It is rubber mounted. What do you think? This picture reminds me of one of those movies where the face of an android robot comes off and you see all of it's circuitry haha.
73' R75/5 LWB
Re: My /5 rebuild intro.
In the Main Loom of wire there IS a brown wire, that what grounds the headlight to the loom that attaches to the mount near the coils